Welding stainless steel by MIG (GMAW) can seem intimidating at first, but with proper technique, equipment setup, and discipline, you can produce clean, corrosion-resistant welds. In this guide we’ll walk through what's mig welding, why it's hard to weld stainless steel, the common stainless steel types, equipment setup for MIG welding stainless steel, and key precautions and techniques to get consistent, high-quality welds using a mig welding machine for stainless steel.
I. What is MIG Welding?
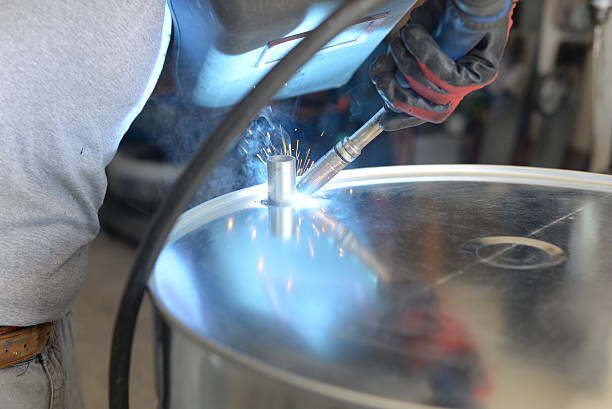
MIG stands for Metal Inert Gas, which refers to the shielding gas that protects the weld from atmospheric contamination. MIG welding is also known as Gas Metal Arc Welding (GMAW) or wire welding because it uses a continuous wire electrode that is fed through a welding gun and forms an arc with the base metal.

MIG welding is suitable for welding a variety of metals, including stainless steel, carbon steel, aluminum, copper, and more. It offers many advantages, such as:
High productivity and efficiency
Low spatter and slag
Good weld appearance and quality
Easy to learn and operate
Ability to weld in different positions and directions
II. Why It’s Hard To Weld Stainless Steel?
Before jumping into MIG weld stainless steel techniques, it helps to understand what makes stainless more challenging than mild carbon steel:
Low thermal conductivity / heat retention: Stainless steels do not conduct heat away as readily as mild steel. That means the heat stays concentrated near the weld zone, making management of heat input more critical. Overheating leads to problems.
High thermal expansion and distortion: Stainless exhibits greater expansion and contraction compared to mild steel. The combination of retained heat and higher expansion can cause warpage or distortion, especially in thin sections.
Sensitization / carbide precipitation: One of the biggest risks when welding stainless is “sensitization.” Between about 800 °F and 1400 °F, chromium and carbon can form chromium carbides along grain boundaries. This depletes chromium in those areas, reducing corrosion resistance and encouraging intergranular corrosion. If the weld or heat-affected zone (HAZ) is overheated, you may see a dark purple or black discoloration—indicating possible carbide precipitation and compromised material.
Contamination sensitivity: Stainless is sensitive to carbon, oxygen, and iron contamination. Using the wrong filler, or contaminating tools or consumables, can introduce defects or corrosion vulnerabilities.
All of these factors mean that MIG welding stainless steel demands tighter control over heat, material selection, and process discipline.
Read How to Weld Stainless Steel Easily: 3 Common Methods Compared.
III. How Many Types of Stainless Steel (and What to Weld)?
Not all stainless steels behave equally. When MIG weld stainless steel, you’ll most commonly encounter and weld the following families:

1) Austenitic stainless (300 series, e.g. 304, 316)
2) Ferritic stainless (400 series, e.g. 430, 434)
3) Martensitic stainless (420, 440, etc.)
4) Duplex stainless
In practice, most MIG welding stainless steel work involves 304 or 316 base metals; you should select a compatible stainless steel filler (e.g. ER308, ER309, ER316, or their low-carbon variants) to match or exceed the base material.
If exact match filler is not available, welders often choose a higher alloy wire to ensure corrosion resistance is not compromised.
IV. MIG Welding Stainless Steel — Equipment Setup
Proper setup of your MIG welding machine for stainless steel is critical. Below is a roadmap of what to configure and check.

1) Shielding Gas
Choosing the correct shielding gas is essential in MIG welding stainless steel:
A tri-mix gas (commonly ~ 90% helium / 7.5% argon / 2.5% CO₂) is often used. The helium helps widen penetration, the argon stabilizes arc, and the low CO₂ keeps carbon introduction minimal.
Some welders also use 98% argon / 2% CO₂ as a simpler alternative when a tri-mix is unavailable.
You may also see argon + a small percentage of oxygen (1–2%) in some cases to stabilize the arc, but that comes with risk of oxidation in the weld pool.
Avoid high CO₂ mixtures (e.g. 25% CO₂) as those introduce too much carbon and can degrade corrosion resistance.
2) Polarity
3) Wire / Filler Selection & Feed
Choose a stainless steel solid MIG wire matching (or exceeding) the base alloy. For example, use ER308 or ER308L when welding 304 base metal.
If you have 316 base, use ER316 or ER316L filler to match corrosion resistance.
Ensure your drive rolls, liner, and MIG gun are dedicated to stainless welding (or at least clean) to avoid contamination from mild steel.
Stainless filler is harder than mild steel; so V-groove drive rolls may struggle to grip. Use knurled or V-knurled drive rolls designed for stainless wire.
Set wire feed speed / amperage carefully: because stainless retains heat, you may need slightly less amperage than for mild steel of the same thickness, but actual setting depends on gas, travel speed, and desired penetration. Start conservatively and fine-tune.
4) Inductance (If Available)
If your MIG welding machine supports an adjustable inductance (or “dip / inductance control”), you may raise inductance to help improve puddle fluidity. Because stainless puddles can be more “ropey” or may not wet out properly, extra inductance can help the molten metal flow to the edges better.
5) Post-Flow Gas
Configure post-flow shielding gas (gas flow after the arc is extinguished) — typically maintain shielding for ~0.5 to 3 seconds (or more for thicker welds) to protect the cooling weld from oxidation.
V. Pre-Weld Preparation & Cleaning
Even the best setup won’t overcome contamination. Before you MIG weld stainless steel, do the following:
Use a dedicated stainless steel wire brush or stainless-only grinding wheel to remove scale, oxidation, mill finish, paint, grease, oil, and other contaminants. Don’t use tools that have been used on mild steel.
Remove hydrocarbons, cutting fluids, pen marks, wax, anti-spatter inhibitors, etc.
Avoid exposure to mild steel dust or particles in the workshop environment (for example, grinding mild steel nearby).
Ensure your MIG gun liner and drive rolls are clean and not contaminated with iron or carbon. Use a liner dedicated to stainless wire if possible.
For welds on pipes or closed sections, you may need purging to protect the backside. Introduce an inert gas (e.g. argon) inside the joint or pipe to displace oxygen. Even a simple method (taping ends and inserting argon hose) works for many applications.
Alternatively, use backing bars or backing strips to support shielding on the reverse side and help thermal conduction. Copper backing can help cool, but be cautious of copper contamination—if used, nickel-plated backing is preferred.
VI. Precautions & Techniques for MIG Welding Stainless Steel
1) Heat Management & Distortion Control
Use the minimum weld size necessary for strength to reduce the volume of weld metal and shrinkage stresses.
Break up long welds into shorter segments or use staggered tack welds to reduce distortion.
Use fixtures, clamps, or jigs to restrain parts and avoid movement during welding.
If necessary, use copper backing bars or chill blocks to draw heat out of the joint (again, ensuring backing is compatible to avoid contamination).
2) Travel Speed, Gun Angle & Technique
Push technique is preferred. Pushing the torch (instead of pulling) promotes better bead appearance, puddle control, and reduces heat concentration.
Use a stringer bead rather than wide weave motions. Weaving can overheat edges and expand the HAZ.
Weld relatively fast — slow speed means too much heat per unit length, increasing risk of discoloration, carbide formation, and distortion. But going too fast may compromise fusion. Balance speed and amperage by testing on scrap.
Maintain consistent torch angle (usually ~5–15° push angle) to stabilize the arc and direct shielding gas toward the pool.
Avoid dwell (stopping) in one location, which concentrates heat. Move steadily.
3) Purging / Backside Protection
For pipes or closed structures, ensure you purge the inside to keep oxygen out during welding. Oxygen in the weld can lead to oxidation, contamination, and corrosion defects.
Use backing bars or strips to protect and support the bottom side of welds, if full purging is impractical.
Ensure back-side shielding until the weld solidifies. Even if perfect backside protection isn’t possible, reduce exposure.
4) Post-Flow & Shielding During Cool Down
After finishing the weld, keep the shielding gas flowing for a few seconds (post-flow) so the solidifying metal remains protected as it cools.
Do not remove the torch immediately — maintain nozzle over the weld endpoint until the cooling weld is safe from atmospheric contamination.
5) Weld Appearance & Quality Checks
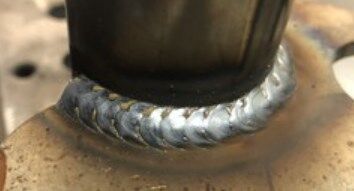
Monitor bead color: light straw, pale yellow, and light blue are usually acceptable. Dark purple or black suggests overheating and carburization.
Inspect for undercut, lack of fusion, porosity, or inclusions.
Test welds under corrosion or mechanical test if required, particularly in critical applications.
Related: How To Clean Stainless Steel Welds After Welding? [Easiest Way].
VII. Common Problems & Remedies in MIG Welding Stainless Steel
| Problem | Likely Cause | Remedy / Adjustment |
|---|
| Discolored weld (dark purple / black) | Overheating, slow travel, too high heat input | Increase travel speed, reduce amperage, break welds into shorter passes |
| Poor wetting or balling of puddle | Low inductance, sluggish puddle | Increase inductance or dwell, refine gas and wire parameters |
| Spatter | Arc instability, incorrect gas mix, erratic feed | Adjust gas mix, check liner and drive rolls, stabilize feed |
| Lack of backside fusion / oxidation on root side | Poor purge or insufficient shielding | Increase purge gas, use backing, extend gas coverage |
| Distortion / warpage | Excess heat buildup, improper restraint | Reduce weld volume, use tack welds, fixture and chill bars |
Conclusion
MIG welding stainless steel is absolutely achievable — but it requires discipline, control, and a good understanding of the material. To reframe the key takeaways:
Stainless is more heat-sensitive than mild steel, so control your heat input carefully.
Choose appropriate stainless wires and shielding gas to preserve corrosion resistance.
Use a clean, contamination-free setup, with dedicated consumables.
Adopt proper travel technique (push, stringer bead, consistent speed) and post-flow shielding.
Use purging, backing, or chill techniques to protect the reverse side where needed.
Finally, test, inspect, and refine your settings on scrap before committing to critical parts.
With patience and practice, you can use your mig welding machine for stainless steel to produce welds that are not only sound and strong, but also visually attractive and corrosion-resistant.
If you have any questions or comments, please feel free to contact us at: https://www.megmeet-welding.com/en/contacts.
FAQs of MIG Welding Stainless Steel
Q1. Why is stainless steel more challenging to MIG weld than mild carbon steel?
Stainless steel is challenging because of three main properties:
Low Thermal Conductivity: Heat is retained near the weld zone, which makes heat input management critical.
High Thermal Expansion: Increased expansion and contraction can lead to distortion or warpage.
Sensitization Risk: Overheating the metal (between 800°F and 1400°F) can cause chromium carbides to form, which depletes the chromium needed for corrosion resistance.
Q2. What is the correct shielding gas to use for MIG welding stainless steel?
The recommended shielding gas is often a tri-mix (typically ~90% helium / 7.5% argon / 2.5% CO₂).
Helium helps widen penetration.
Argon stabilizes the arc.
The low CO₂ keeps carbon introduction minimal to preserve corrosion resistance. High CO₂ mixtures should be avoided.
Q3. How should I select the correct filler wire for stainless steel?
The filler wire should match (or slightly exceed) the alloy of the base metal to maintain corrosion resistance.
For example, welding 304 stainless steel requires an ER308 or ER308L filler wire.
Welding 316 stainless steel requires an ER316 or ER316L filler wire.
Q4. What special preparation and equipment precautions must be taken to prevent contamination?
Stainless steel is highly sensitive to iron and carbon contamination. To prevent this:
Use a dedicated stainless steel wire brush or grinding wheel that has never been used on mild steel.
Ensure the MIG welder's drive rolls, liner, and gun are dedicated to stainless steel or thoroughly cleaned.
For critical welds on pipes or closed sections, purge the backside of the joint with an inert gas (usually argon) to displace oxygen.
Q5. What are the best techniques and settings for controlling heat and distortion when welding stainless steel?
To manage heat and minimize distortion:
Use the minimum weld size necessary for strength.
Weld relatively fast to reduce heat input per unit length, which minimizes the risk of dark purple/black discoloration (a sign of overheating).
Use a push technique and stringer beads (avoid wide weaves) to maintain control and reduce heat concentration.
Use post-flow shielding gas (for 0.5 to 3 seconds or more) to protect the cooling weld from immediate oxidation.
Related articles:
1. Why Does Stainless Steel Rust After Welding?
2. Stainless Steel Welding: What is it, Benefits, & Methods
3. Stainless Steel Weld Cleaning: A Complete Guide to Methods & Techniques
4. TIG Welding Stainless Steel: A Beginners Guide
5. How To MIG Weld Stainless Steel Like a Pro?


