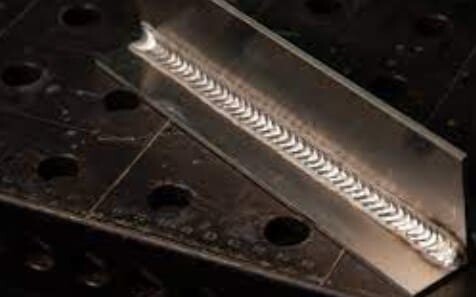
I. Why MIG Welding Dominates Modern Fabrication?
MIG welding, short for Metal Inert Gas welding, formally known as Gas Metal Arc Welding (GMAW), has revolutionized metal fabrication since its development in the WWII era. Today, it accounts for over 50% of all industrial welding applications due to its unbeatable speed, versatility, and accessibility.

Industry Insights:
The Global Welding Equipment Market Size was valued at USD 18.50 billion in 2022, and the Worldwide Welding Equipment Market Size is expected to reach USD 29.28 billion by 2032, according to a research report published by Spherical Insights & Consulting. Among which, MIG systems lead the growth.
Automotive manufacturers prefer MIG for its 3-4x faster deposition rates compared to stick welding.
Modern inverter-based MIG machines can achieve 90% energy efficiency, reducing operational costs.
What This Guide Covers:
✓ Professional setup techniques used in shipbuilding and aerospace
✓ Little-known gas mixtures that can transform weld quality
✓ Advanced troubleshooting for common defects
✓ Proprietary techniques from certified welding inspectors
II. The Science Behind MIG Welding
1) Physics of the Arc
The MIG process creates an electric arc reaching 6,500°F (3,600°C) - hotter than lava flow. This melts both the consumable wire electrode (typically ER70S-6 for mild steel) and base metal, while shielding gas (usually Ar/CO₂ mix) prevents atmospheric contamination.
Key Metallurgical Considerations:
Weld Pool Dynamics: Surface tension and Marangoni effects dictate bead shape.
Heat Affected Zone (HAZ): Can extend 0.25-0.5" from weld, requiring proper pre/post-heat treatment for high-strength steels.
Solidification Rates: Faster cooling increases hardness but may cause hydrogen cracking.
2) Comparative Analysis:
| Process | Deposition Rate (lbs/hr) | Skill Level | Typical Applications |
| MIG | 5-8 | Beginner | Automotive, structural |
| TIG | 1-3 | Expert | Aerospace, pipe |
| Stick | 2-5 | Intermediate | Field repairs, heavy equipment |
III. Professional-Grade Machine Configuration
Industrial MIG System Components:
1) Power Source:
2) Wire Feeding System:
3) Cooling Options:
Calibration Protocol:
Verify wire feeder tension using spring scale (3-5lb pull force)
Check liner alignment with wire straightness test
Calibrate gas flow with floating ball flowmeter
Validate voltage output with digital multimeter
IV. Advanced Shielding Gas Strategies
Specialty Gas Blends
98%Ar/2%O₂: For stainless steel (prevents sugaring)
90%He/7.5%Ar/2.5%CO₂: Aluminum spray transfer
Stargon® Tri-Mix: Reduces spatter by 40% in robotic applications
Gas Flow Optimization:
Where:
Q = Flow rate (CFH)
D = Nozzle diameter (inches)
v = Gas velocity (fpm)
V. Precision Control Systems
Synergic MIG Programming
Modern power sources feature:
Adaptive voltage control (AVC)
Real-time inductance adjustment
Burn-back compensation algorithms
Robotic Welding Parameters:
| Parameter | Mild Steel | Aluminum |
| Wire Speed | 400 IPM | 650 IPM |
| Arc Voltage | 22V | 24V |
| CTWD | 3/8" | 1/2" |
VI. Machine Maintenance Mastery
Preventative Maintenance Schedule
Daily:
Clean drive rolls and liner
Check contact tip orifice
Verify gas system integrity
Monthly:
Recalibrate wire feed encoder
Test ground circuit resistance (<0.1Ω)
Inspect transformer cooling fins
Annual:
VII. Next-Level Safety Protocols
Laser Safety Integration
IR/UV filtering lenses (Shade 5+)
Fume extraction velocity requirements:
100-150 fpm capture velocity
800-1000 CFM for booth systems
NFPA 51B Compliance Checklist:
VIII. Certified Welding Techniques
AWS D1.1 Structural Welding Code
Backstep Technique: For distortion control
Weave Pass Sequencing: 50% overlap rule
Interpass Temperature Control: 250-400°F for HSLA steels
Procedure Qualification Records (PQRs):
IX. Metallurgical Preparation
Surface Engineering
White metal blast cleaning: Sa 3 level
Chemical passivation: For corrosion-resistant alloys
Laser ablation: For zinc-coated steels
Fit-Up Tolerances:
| Joint Type | Maximum Gap |
| Butt Joint | 1/16" |
| T-Joint | 1/8" |
| Lap Joint | 3/32" |
X. Industrial Case Studies
1) Automotive Body-in-White
Challenge: Galvanized steel porosity
Solution: 92%Ar/8%CO₂ with 0.8mm wire
Result: 0% porosity at 45m/min travel speed
2) Pressure Vessel Fabrication
Challenge: Hydrogen cracking
Solution: 350°F preheat + ER100S-G wire
Result: 100% UT pass rate
3) Additive Manufacturing
Challenge: Wire feeding consistency
Solution: Closed-loop servo control
Result: ±0.002" deposition accuracy
Conclusion
MIG welding is a skill that improves with practice. By following these MIG welding tips, you’ll minimize defects, reduce spatter, and produce professional-quality welds. Whether you're a hobbyist or a seasoned welder, mastering these fundamentals will make your projects faster, stronger, and more efficient.
Related articles
1. Spot Welding vs. TIG Welding vs. MIG Welding: Differences & How to Choose?
2. Shielding Gases for TIG & MIG Welding: which gas is best?
3. Pulsed MIG Welding: Mastering Techniques for Superior Results
4. Pulsed MIG Welding Aluminum and Stainless Steel
5. Pros and Cons of Stick Welding and MIG Welding


